|
3D PAPER MODELING Static Samples Kinetic Samples My latest hobby involves making 3D models from thick paper stock. It is a challenge that requires designing a shape that when cut and folded will create a 3D model. While designing a shape is relatively easy, cutting and folding precisely requires patience and skill. Enters the electronic cutter, a machine that functions basically as an inkjet printer but with a sharp blade on a pivot instead of an ink cartridge. It is basically a table top X-Y plotter with a blade instead of a pen. Also it is essentially the same type of cutter used in the vinyl sign industry but with some modifications so it can cut through the material rather than cut only the vinyl without its backing. Depending on the brand and size of such a cutter, it is possible to cut a very thick paper, up to about 1/8" thickness and to cut through some thin plastics. I bought recently such a cutter, brand named Silver Bullet. The cutter is made in China by Foison Industries and is distributed under at least two brand names with small differences between them. The Silver Bullet comes in 3 widths, the 24" model being the widest. The picture below is the 24" model which I bought in October, 2012 for about $1,200. This cutter is about 34" wide and can accept media of up to about 27" in width. The material moves back and forth and the blade cartridge moves left and right.
To solve the problem so the cutting blade will go through the material without damaging the machine, a thin cutting mat is placed underneath the material being cut. The mat is about 20 thousands of an inch thick, so one needs to adjust the blade depth of penetration carefully. The force or pressure on the blade is adjustable so one can cut partially or through the material as needed. The cutter connects to a computer either via a USB or a Serial cable. This cutter uses a very basic graphics software called SCAL which communicates with the cutter and allows to execution of the commands on the computer screen. Fortunately, one can import SVG files into the software, which means that one can work with an advanced vector software program such as Adobe Illustrator, which is what I use. The end product, that is the cut paper shapes, range from acceptable to excellent, depending on the experience of the operator and the limitations of the machine. Here are some samples of paper-art which I have done recently: PAPER MODELING SAMPLES I am still learning the ropes of this machine but one of the features which attracted me was the ability to print an image on a conventional printer, then to place it in the cutter and cut the image. What actually needs to happen is to send the print command to the printer from within the SCAL software. This allows the placement of 3 registration marks around the shape, which are then used by the software to tell the cutter where the reference points are. This procedure is called "Print and Cut" although in reality the print part and the cut portion are done on different machines. In order to match the registration marks on the computer screen with the physical registration marks which were printed on the same sheet of paper as the shape, one has to direct the blade via arrows on the screen. So much for theory. Unfortunately the machine times out at this specific mode of communication in less than 5 seconds. This bug is admitted by the makers of the software and apparently affects some machine/computer combinations and not others. Too bad that it affects my machine. Of course I tried to get help through the usual channels and forum boards, but all suggestions were of little practical use to me at this stage. MY SOLUTION I did find a solution. My solution is basically doing the process in reverse. I call it "Cut and Print". Basically the shape is designed, then cut on the cutter and then printed on top with whatever graphic you wish. Here are the details of my solution. 1. Design your shape and place the cut lines on one layer and the graphic image on a second layer. Only the cut lines will be used by the cutter.
This is a screen shot of the desktop of SCAL with my imported image. The large blue frame is the virtual mat. The cutter follows only vector lines and ignores everything else, so in the example above, it will cut the outline of the blue shape and the outline of the letters. (The letters were converted to vector outlines previously in Adobe Illustrator.) 2. Place a sheet of paper in the cutter and send a "cut" command to the cutter. 3. Remove both the cut shape and the paper around the shape carefully from the cutter and turn both parts upside down. Use removable tape to secure the cut shapes to the original sheet. 4. Measure the exact distance of the cut shape in relation to the paper and place the graphics exactly at that location on the screen.
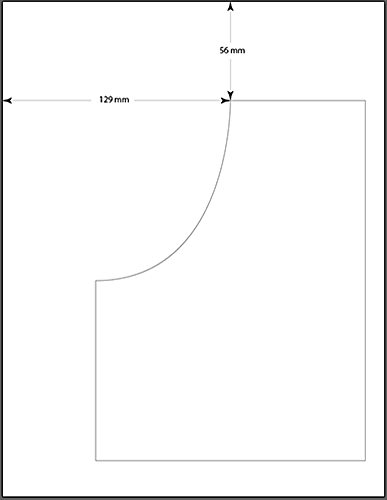
5. Insert this assemblage into your printer to print the graphic inside the cut piece.
The graphic consists of the blue shape and the "penta" portion of the word "pentagone" (notice the play on words...) The "gone" part of the word was cut when the outside part was also cut. 6. Here is a picture of the actual finished piece. Notice the cut lines in the "gone" part:
Yes, it's gone! Although I solved my specific problem, one has to remember that the solution depends on having a high end program like Illlustrator, where accurate and precise positioning, etc., can be accomplished. Although I have not had a chance to try the original "Print and Cut" method, the method described here is precise to a fraction of a millimeter! Having done all that, I am awaiting for an updated version of the SCAL software so I can compare both methods. To my surprise and delight, after a few back and forth discussions about the problem, the software company which makes SCAL, solved the problem and sent me directly the updated version of the software. Having dealt with software companies in the past and getting nowhere, I am happy to report that the solution works. Hurray for this software company!
|
|
|
|
|
|
|
|
|
|
|
|
|
|
|
|
|